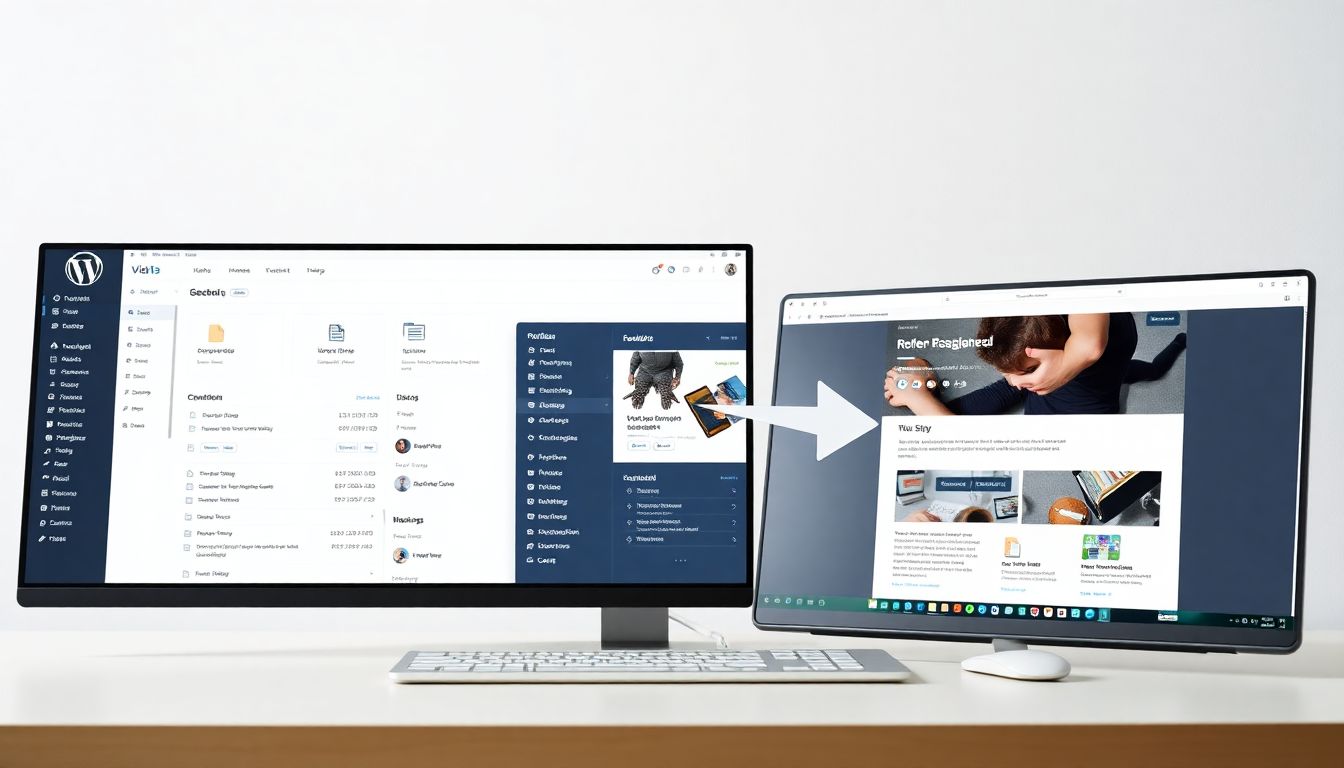
Screenshot
Business Technology Consultants

Retiring From Your Business

Crafting Your Perfect Exit Plan

Imagine trading board meetings for beach holidays. Picture yourself swapping spreadsheets for sunsets, and profits for pure relaxation. It's the retirement dream! But for business owners, it's mixed with a bit of anxiety. How do you leave something you've poured your heart and soul into?

A well-defined exit plan is super important. It's key for a secure financial future and a fulfilling retirement after your business life.

Section 1: Why You Need an Exit Strategy

Skipping exit planning is like sailing without a map. You might reach a shore, but it may not be the one you wanted! Let's explore the risks of not planning, and the advantages of having a smart exit strategy.

Understanding the Risks of Neglecting Exit Planning

Not planning your business exit can be a recipe for disaster. You could undervalue your business, leading to financial loss. Partnership disagreements can turn ugly if not addressed beforehand. Unexpected legal problems may appear when you try to sell or transfer ownership. Don’t leave things to chance!

The Benefits of a Strategic Exit Plan

A good exit strategy provides financial security. It helps preserve the legacy of your business. Plus, it brings peace of mind knowing you've handled things correctly. You'll have a clear path forward for yourself and your business. It’s a win-win situation!

Statistics on Business Transitions

Did you know that many businesses don’t survive the owner's exit? Shockingly, only about 30% successfully transition to the next generation. Poor planning is often to blame. Having a solid plan improves your odds of a smooth and successful transition. This ensures your hard work pays off in the end.

Section 2: Assessing Your Business & Personal Finances

Before you set sail, you must know where you stand. This means assessing your business value and your personal finances. Preparation is vital for a successful retirement transition.

Determining the True Value of Your Business

What's your business really worth? It's not just about sales figures. You should consider assets, liabilities, and market conditions. There are different methods to find its true value.

  • Market approach: Looks at what similar businesses have sold for.
  • Income approach: Estimates value based on future earnings.
  • Asset approach: Calculates value based on the company's net assets.

A qualified appraiser can help you pick the right method. They can provide an objective valuation for your business.

Evaluating Your Retirement Income Needs

How much money will you need each month in retirement? Estimate your living expenses, and don't forget to factor in inflation. Healthcare costs can also be significant, so plan for them. Consider consulting a financial advisor for tailored guidance.

Analyzing Your Personal Financial Portfolio

Take a close look at your investments and retirement accounts. Do they align with your retirement goals? Do you have enough savings to support your desired lifestyle? Rebalance your portfolio if needed. It is better to be safe than sorry.

Section 3: Exploring Exit Options

There are several ways to leave your business. Let's explore some common options. Each one has its pros and cons.

Selling to a Third Party

Selling to an outside buyer is a popular option. This could be a strategic buyer (a competitor) or a financial buyer (a private equity firm). Expect thorough due diligence from the buyer. They will want to examine your financials and operations closely.

Passing the Business to Family

Succession planning can be tricky, if you intend to pass on the business to your family. Family dynamics can complicate things. You must also consider the tax implications of transferring ownership. It is advisable to have open and honest conversations with family members early on.

Employee Stock Ownership Plan (ESOP)

An ESOP allows employees to own a stake in the company. This can be a great way to reward loyal workers. ESOPs can also offer tax advantages for the owner. Employees become invested in the company's success. It builds morale!

Liquidation

Sometimes, liquidation is the most sensible option. This involves selling off the company's assets. It can be the right choice if the business is struggling. However, it can also be emotionally difficult. You should carefully consider the pros and cons.

Section 4: The Legal and Tax Implications

Exiting your business involves important legal and tax considerations. It is important to understand the potential impact of these. Get professional advice!

Understanding Capital Gains Taxes

Selling your business usually triggers capital gains taxes. The tax rate depends on how long you've owned the business. Proper planning can help minimise the tax burden.

Navigating Legal Agreements and Contracts

Purchase agreements, non-compete agreements, and consulting agreements are common. Read these documents carefully. Ensure you understand all the terms and conditions.

Minimizing Tax Liabilities

There are strategies to reduce taxes. Installment sales and charitable contributions are two examples. Consult with a tax advisor to explore your options. Every situation is unique.

Section 5: Building Your Retirement Team

You don't have to do this alone. Surround yourself with the right professionals. They can provide valuable guidance and support.

Selecting a Financial Advisor

Look for a financial advisor with experience in retirement planning. Check their qualifications and fee structure. Choose someone you trust to manage your wealth.

Hiring a Legal Counsel

A lawyer can help you navigate the legal complexities of exiting your business. Find someone with experience in business transactions. They can protect your interests and ensure a smooth transition.

Working with a Chartered Accountant

A Chartered Accountant can provide expert tax advice. They can help you minimise your tax liabilities. Look for a CPA with experience in business sales. They are an important resource for your team.

Conclusion

Planning your exit is as crucial as building your business. It guarantees a financially secure and fulfilling retirement. Assess your business, explore your options, and build a strong team. Remember, exit planning is a process, not a one-time event. Start planning early and enjoy a rewarding retirement!

Effortless WordPress Migration

Exporting and Importing Pages the Right Way

Ever felt stuck with your current website setup? Perhaps you're itching for a fresh look or a better hosting provider. The thought of moving all your precious WordPress pages might seem daunting. You worry about losing data, broken links, or messing up your SEO. But what if I told you moving those pages could be easy? This guide will show you a stress-free method to export and import your WordPress pages.

Understanding WordPress Export and Import

WordPress has handy tools for moving your content. The export and import features are built right in! But it is important to understand something. These tools move content only, not your entire website setup.

What is the WordPress Export Feature?

The export feature creates an XML file. This file contains your pages, posts, and other content. Think of it as a neatly packaged bundle of your important stuff. The XML file includes your page titles, text, and sometimes even the media.

What is the WordPress Import Feature?

The import feature takes that XML file and adds its content to a new WordPress site. It's like unpacking the bundle and putting everything in its place. Keep in mind, it's not perfect, though. The import feature might need a little help with some things.

Step-by-Step: Exporting Your WordPress Pages

Ready to grab your pages and go? Here's how to export them from your current WordPress site.

Logging into Your WordPress Dashboard

First, you need to get into the driver's seat of your website. This means logging into your WordPress dashboard. Usually, you can do this by adding "/wp-admin" to your website's address. For example, www.yourwebsite.com/wp-admin. Enter your username and password to log in.

Navigating to the Export Tool

Once you're in, look at the menu on the left side. Find "Tools" and click on it. A submenu will pop up, and then click "Export." That's your ticket to getting your pages out.

Choosing "All Content" vs. Specific Pages

Now, you have a choice to make. You can export everything, or you can pick and choose. Since we just want pages, select that option. To export only pages, select "Pages" from the options. You can even filter by date if you only need certain pages. Select the pages you want to export.

Downloading the Export File

After you have selected the pages, click the "Download Export File" button. This will save the XML file to your computer. Give the file a descriptive name, such as "my-wordpress-pages.xml". This will help you find it later.

Setting Up Your New WordPress Site

Before you import, you need a new home for your pages. This means setting up a new WordPress site.

Choosing a Hosting Provider and Domain Name

Your website needs a place to live on the internet. You need a hosting provider for this. A good host is reliable and keeps your site running smoothly. You will also need a domain name (like www.example.com). It's your website's address.

Installing WordPress

Most hosting providers make installing WordPress easy. They often have one-click installers. You can also download WordPress from wordpress.org and install it yourself. The official WordPress documentation can walk you through it.

Accessing the WordPress Dashboard on Your New Site

After WordPress is installed, log into your new site's dashboard. You'll use the same process as before: www.yournewwebsite.com/wp-admin.

Importing Your WordPress Pages

Now for the big move! Here's how to import your pages into your new WordPress site.

Navigating to the Import Tool

Just like before, find "Tools" in the left-hand menu. Click on it, and then click "Import."

Installing the WordPress Importer Plugin

WordPress can import content from many sources. You will need to install the WordPress Importer plugin. You'll see a list of import options. Find "WordPress" and click "Install Now." Once it's installed, click "Run Importer."

Uploading Your Export File

Now, click the "Choose File" button. Find the XML file you downloaded earlier (like "my-wordpress-pages.xml"). Select the file and click "Upload file and import".

Assigning Authors and Importing Attachments

The next step is to assign authors to the imported pages. You can assign them to an existing user. You can also create a new user. Be sure to check the box that says "Download and import file attachments." This will bring over your images and other media.

Post-Import Checklist and Troubleshooting

After the import, it's time to make sure everything is working correctly.

Checking for Broken Links

Broken links are a pain. They make your site look unprofessional. Use a link checker plugin to find any broken links. Fix them promptly.

Verifying Page Formatting and Media

Take a look at your pages. Make sure the text looks right. Check that all the images and videos are there. Sometimes, formatting can get messed up during the move.

Redirecting Old URLs (if applicable)

If your page addresses have changed, set up redirects. Redirects tell visitors (and search engines) that your content has moved. This is important for SEO. Otherwise, people might land on error pages, and your search ranking could suffer.

Common Import Errors and Solutions

Sometimes, things go wrong. You might see an error message about exceeding the maximum file size. If this happens, ask your hosting provider to increase the upload limit. Alternatively, you can split the export file into smaller chunks.

Conclusion

Moving your WordPress pages doesn't have to be a headache. By using the built-in export and import tools, you can make the switch smoothly. You can enjoy better performance and a fresh design. So go ahead, take the leap and give your website a new lease on life! If you need help then contact us.

Troubleshoot Printer Network Connectivity

Ever tried printing something important, only to find your printer stubbornly offline? It's a common frustration. Network printer issues can halt your workflow. We'll explore the most common reasons for these connection problems. Maintaining a reliable connection keeps everyone productive.

Understanding the Basics of Network Printing

Let's explore network printing and it's perks.

What is Network Printing?

Network printing allows multiple devices to share one printer. Instead of connecting directly via USB, it uses a network. This is super helpful for homes and offices. Everybody can print without needing to plug anything in.

Types of Network Connections for Printers

Wi-Fi and Ethernet are common. Wi-Fi offers wireless convenience, but can suffer from interference. Ethernet provides a stable wired connection. Other options exist but are less common. Each method has advantages and disadvantages. Wi-Fi is easy, Ethernet is dependable.

Diagnosing Common Network Printer Problems

Before diving deep, let's check the basics.

Is the Printer Online?

Start by checking the printer's screen. Look for error messages or an "offline" status. Some printers let you manually bring them online. If that's the case, give it a go.

Testing Network Connectivity

The "ping" command tests if your computer and printer talk. Find the printer's IP address, typically in its settings. Then, open the command prompt and ping the IP. If you get a reply, that's a good sign. A failed ping suggests a connection problem.

Troubleshooting Wi-Fi Connectivity Issues

Wi-Fi problems are frequent. Let's look at a few fixes.

Verifying Wi-Fi Credentials

Double-check the Wi-Fi password on your printer. Make sure it matches your network's password. Update it if needed through the printer's settings. Then, reconnect the printer to your Wi-Fi.

Addressing Wi-Fi Signal Strength

Weak Wi-Fi can cause printer issues. Try moving the printer closer to the router. Remove any obstacles blocking the signal. Walls and metal cause interference. Stronger signal, better printing.

Router and Network Configuration

Your router may block the printer. Check the router's firewall settings. Make sure the printer isn't on a blocked list. Enabling WPS simplifies connections. This creates a smoother setup.

Troubleshooting Ethernet Connectivity Issues

Ethernet offers stability, but issues still pop up.

Checking the Ethernet Cable and Ports

Visually inspect the Ethernet cable. Look for damage or loose connections. Ensure it's firmly plugged into the printer and router/switch. Test different ports to rule out a faulty one.

Addressing IP Address Conflicts

IP address conflicts disrupt network communication. Release and renew the printer's IP address in its settings. For reliable connections, consider a static IP address. Configure this within the printer's network settings.

Network Switch and Router Configuration

Confirm the network switch is working. Ensure the printer connects to an active port. Check router settings for blocks. DHCP should be enabled for automatic IP assignment.

Driver and Software Related Issues

Correct drivers and software are key.

Updating Printer Drivers

Download the latest printer drivers from the manufacturer's site. Use the correct drivers for your operating system (Windows, macOS). Outdated or incorrect drivers cause printing headaches.

Reinstalling Printer Software

Uninstall then reinstall the printer software. Use the manufacturer's software for printer management. It offers tools and features. This will help maintain printer health.

Advanced Troubleshooting Techniques

Sometimes, you must dig deeper.

Checking and Updating Printer Firmware

Check the printer's firmware version. Update it if an update is available. Follow manufacturer's directions closely during firmware updates. Incorrect updates risk printer damage.

Resetting the Printer to Factory Settings

A factory reset restores the printer to its default settings. Find the reset option in the printer's menu. Note that you will lose any custom settings. Use this as a last resort.

When to Seek Professional Help

If all else fails, seek a qualified technician's expertise. Complex network issues or hardware problems require professional intervention. Don't hesitate if you're stuck.

Conclusion

Troubleshooting printer network woes takes a methodical approach. Remember to check the basics, address Wi-Fi or Ethernet issues, and keep drivers updated. A stable printer network boosts productivity. Proactive maintenance prevents future problems.

Missing Emails?

Missing Emails? Troubleshoot and Recover Your Lost Messages

Ever felt that punch to your gut when an important email goes missing? Perhaps it was a job offer, a critical invoice, or even a simple hello from family. The panic sets in quickly. Many reasons exist why your email might be MIA. These range from simple filter settings to complex server issues. This article? It will arm you with a complete guide to find those missing messages and keep them safe.

Check Basic Email Settings and Filters

This section focuses on the easiest fixes. Let's tackle common causes for vanishing emails, fast.

Review Your Email Filters

Email filters are like tiny digital assistants. They sort your mail based on rules you set. Sometimes, these filters can misdirect emails. They might send messages to a strange folder, or even delete them.

To check filters in Gmail:

  1. Click the gear icon, then "See all settings."
  2. Go to the "Filters and Blocked Addresses" tab.
  3. Review each filter for errors.

In Outlook:

  1. Go to "File" then "Manage Rules & Alerts."
  2. Check each rule to ensure it's working correctly.

For Yahoo Mail:

  1. Click the "Settings" icon, then "More Settings."
  2. Select "Filters."
  3. Review each filter.

Imagine this: you created a filter to delete emails about "Project X" but accidentally included "Project XY". Oops! Now, important updates are gone.

Examine Blocked Senders List

Ever accidentally block someone? It happens. Blocked sender lists prevent emails from reaching you. You need to manage this list carefully. Legitimate senders can get trapped there.

In Gmail:

  1. Go to "Settings" then "Filters and Blocked Addresses."
  2. Review the blocked addresses list.
  3. Remove any senders who should not be blocked.

For Outlook:

  1. Go to "Home" tab, then "Junk" and "Block Sender List."
  2. Check for any valid senders.

For Yahoo Mail:

  1. Click the "Settings" icon, then "More Settings."
  2. Select "Filters."
  3. Look for any rules that block senders.

Check your blocked list regularly. It only takes a moment to correct a mistake.

Verify Email Forwarding

Email forwarding automatically sends copies of your emails to another address. Sounds useful, right? But it can cause confusion. Emails might be going somewhere you don't expect.

To check in Gmail:

  1. Go to "Settings," then "Forwarding and POP/IMAP."
  2. See if forwarding is enabled. Note the forwarding address.

In Outlook:

  1. Go to "File," then "Manage Rules & Alerts."
  2. Look for rules that forward emails.

For Yahoo Mail:

  1. Click the "Settings" icon, then "More Settings."
  2. Select "Mailboxes."
  3. Check the forwarding address.

Be aware of unauthorized forwarding. It's a security risk. Change your password if you see something odd.

Investigate Spam and Junk Folders

The spam folder. It's the email equivalent of the Bermuda Triangle. Many "missing" emails end up here.

Manually Search Spam/Junk Folders

First, check every spam and junk folder. Simple? Yes. Effective? Absolutely.

After finding a valid email, mark it as "not spam." This helps the filter learn what’s important to you. It might take some time, but it will improve future filtering. Checking these folders regularly is also key.

Adjust Spam Filter Settings

Your spam filter's sensitivity determines what gets flagged. Too sensitive? Important emails get trapped. Not sensitive enough? You're swamped with junk.

To whitelist addresses in Gmail:

  1. Create a filter.
  2. Enter the sender's address in the "From" field.
  3. Click "Create filter."
  4. Choose "Never send it to Spam."

In Outlook:

  1. Go to "Home" then "Junk," then "Junk E-mail Options."
  2. Go to the "Safe Senders" tab.
  3. Add email addresses or domains to the list.

For Yahoo Mail:

  1. Add the sender to your contacts list. Yahoo rarely marks contacts as spam.

Don't disable spam filters entirely. A little protection goes a long way.

Troubleshoot Email Client and Device Issues

The problem might not be your email account. It could be the email program or device you use.

Check Email Client Sync Settings

Is your email program syncing correctly? If not, new emails won't appear.

To force sync in Outlook:

  1. Click "Send / Receive" tab.
  2. Click "Update Folder."

In Gmail app:

  1. Swipe down on the inbox to refresh.

Check for error messages. Something like "Account not syncing" could be a clue.

Update Email Client or App

Outdated software? It can cause trouble. Updates fix bugs and improve compatibility. This includes email clients.

To update on desktop:

  1. Check the program's "Help" menu for updates.

On mobile:

  1. Go to the app store and update the app.

Updates keep things running smoothly, which can stop some problems.

Examine Device Storage

Low storage can stop new emails from downloading. Make space for them!

To check storage:

  • On Windows: Go to "Settings," then "Storage."
  • On macOS: Go to "About This Mac," then "Storage."
  • On Android: Go to "Settings," then "Storage."
  • On iOS: Go to "Settings," then "General," then "iPhone Storage."

Delete old files, photos, or apps. You could also move them to external storage. A little cleaning can free up space.

Investigate Server-Side Issues and Account Settings

Sometimes, the problem lies with your email provider. Let's see what we can find.

Contact Your Email Provider's Support

Can’t fix it yourself? Contact support. They have tools and knowledge you don't.

Here are links to support pages:

Have your account details handy. It will speed up the process.

Check Server Status

Email providers sometimes have outages. These outages can cause delays or lost emails.

Check these status pages:

  • Google Workspace Status: https://www.google.com/appsstatus
  • Microsoft 365 Service Health: Check within your Microsoft 365 admin centre.
  • Yahoo Mail: No dedicated status page, check their Twitter feed for updates.

A green light means everything is fine. A red or yellow light means there's a problem.

Review Account Storage Limits

Is your inbox full? This can prevent new emails from arriving.

To check storage usage:

  • Gmail: Look at the bottom left of the Gmail page.
  • Outlook: Go to "File," then "Info," then "Account Settings."
  • Yahoo Mail: Check the bottom of your inbox page.

Delete old emails or upgrade your plan. Freeing up space helps new emails get through.

Consider Advanced Troubleshooting Techniques

For tech-savvy users, let’s explore some advanced methods. These techniques can help with tricky situations.

Examine Email Headers

Email headers contain technical details about a message. They can reveal where an email went wrong.

To view headers:

  • In Gmail: Open the email, click the three dots, then "Show original."
  • In Outlook: Open the email, click "File," then "Info," then "Properties."
  • In Yahoo Mail: Open the email, click the three dots, then "View Raw Message."

Key header fields:

  • Received: Shows the servers the email passed through.
  • From: Shows the sender's email address.
  • To: Shows the recipient's email address.

Headers can show routing problems, such as if an email got stuck.

Use Email Recovery Tools

Accidentally deleted an important email? Data recovery software might help. Just be careful! This is only for messages that were permanently deleted.

Check DNS Records

For users with custom domains: DNS records affect email delivery. Incorrect DNS settings can cause problems.

Use online DNS lookup tools to check your records. Make sure they are set up correctly.

Conclusion

Finding missing emails can be frustrating. But by checking filters, spam folders, and account settings, most issues can be resolved. Regularly managing your email and updating software are key steps. If you're still stuck, reach out to professional support for assistance. Good email management is worth the effort.

Mastering Computer Keyboard Shortcuts

Unlock Productivity

Imagine spending ages doing the same tasks on your computer, clicking through menus repeatedly. Sounds familiar, right? What if you could slash that time and become more efficient? Keyboard shortcuts are the answer! Mastering just a few basic shortcuts can dramatically boost how quickly you work.

Basic Keyboard Shortcuts: The Foundation of Efficiency

Here, we will focus on shortcuts you can use everywhere, no matter which computer or program you're using. These are the core skills to learn, offering efficiency across various applications.

Ctrl + A: The Art of Selecting Everything

Ctrl + A is a simple, but powerful command. Its main function is to select everything. This could be all the text in a document, all the files in a folder, or all the items in a window.

For example, if you're working on a report, hit Ctrl + A to select all the text. You could then change the font, size or apply formatting to the whole document.

Ctrl + B: Boldly Emphasizing Your Point

Need to make some text stand out? Ctrl + B is your friend! Select the words you want to emphasize, then press Ctrl + B. The selected text instantly becomes bold.

Try this. If you're sending an email, use Ctrl + B to highlight key information. This makes it easy for the receiver to quickly spot the important details.

Ctrl + C: Copy and Paste Like a Pro

Copying and pasting is a vital part of using computers. Ctrl + C lets you copy items. The copied item is saved to your clipboard, ready to be pasted somewhere else.

For example, want to copy a file from one folder to another? Select the file, press Ctrl + C, then go to the other folder and paste.

Ctrl + D: The Versatile Fill Command

Ctrl + D is a handy shortcut, but its function depends on the program you're using. In some programs, it might bookmark a webpage. In others, it could fill cells in a spreadsheet.

In Excel, Ctrl + D copies the formula from the cell above into the selected cell. It's a quick way to duplicate a formula down a column.

Essential Shortcuts for Text Editing and Formatting

These shortcuts are a godsend when writing, editing and formatting documents. They'll save you time and energy.

Ctrl + X, Ctrl + V: Cut, Copy, and Paste Trio

You already know Ctrl + C (copy). But, have you met Ctrl + X (cut)? Cutting removes the item, while copying duplicates it. Ctrl + V pastes either a copied or cut item.

Need to move a whole paragraph in a document? Cut the paragraph using Ctrl + X, then paste it where you want it with Ctrl + V. It's much faster than dragging and dropping.

Ctrl + Z, Ctrl + Y: The Undo/Redo Lifesavers

Made a mistake? Don't panic! Ctrl + Z is your 'undo' button. It reverses your last action. Need that action back? Ctrl + Y will 'redo' it.

Imagine accidentally deleting a big chunk of text. Press Ctrl + Z, and it'll reappear. Accidently undone something you needed? Ctrl + Y will bring it back.

Ctrl + F: Find Anything, Instantly

Looking for a specific word or phrase in a long document? Ctrl + F opens a search box. Type in what you're looking for, and it'll highlight every instance in the document.

Use this to find and replace errors in a long document. Type in the error, find all instances, and replace them.

Navigating Your Computer with Lightning Speed

These shortcuts help you to move around your computer quickly. They'll make file and window management much easier.

Alt + Tab: Window Switching Master

Have lots of programs open? Alt + Tab lets you quickly switch between them. Hold down Alt and press Tab to see all open windows. Keep pressing Tab to cycle through them. Release Alt to select the highlighted window.

If you are multitasking between several programs, use Alt + Tab to jump between them quickly.

Windows Key + D: Show Desktop, Instantly

Need to get to your desktop quickly? Press Windows Key + D. It minimises all open windows, showing your desktop icons.

Quickly access desktop icons when your screen is cluttered. This is easier than minimising each window one by one.

Ctrl + Shift + Esc: Task Manager Shortcut

Is an application frozen? Press Ctrl + Shift + Esc. This opens the Task Manager, where you can force quit unresponsive programs.

If an application has stopped responding, use this shortcut to open Task Manager and close the program.

Advanced Shortcuts for Power Users

Ready to level up? These shortcuts are a bit more advanced, but they can be incredibly useful.

Windows Key + L: Lock Your Computer Securely

Stepping away from your computer? Lock it with Windows Key + L. This prevents others from accessing your information.

In public places, always lock your computer when you leave your desk. It only takes a second and it protects your data.

Ctrl + Shift + T: Restore Your Last Browsing Session

Accidentally closed a tab in your web browser? Ctrl + Shift + T reopens the last tab you closed. Press it again to reopen the tab before that, and so on.

Use this to recover tabs you accidentally closed. No more digging through your browsing history.

Customizing and Mastering Your Shortcut Arsenal

Don't stop here! You can even customise shortcuts. Learning new skills is always useful.

Exploring Application-Specific Shortcuts

Most programs have their own set of shortcuts. For instance, Adobe Photoshop uses shortcuts for various tools. Learning these can significantly speed up your workflow within those programs.

For example, in Photoshop, learn the shortcuts for frequently used tools like the brush, eraser, and selection tools.

Resources for Learning More

Websites and tutorials offer even more shortcuts. Many resources are available online to help you master computer shortcuts.

Why not set aside 15 minutes a day to learn one new shortcut? Over time, it'll make a big difference.

Here is a full list:

Basic Commands:
Ctrl + A - Select all
Ctrl + B - Bold
Ctrl + C - Copy
Ctrl + D - Fill
Ctrl + E - Center text
Ctrl + F - Find
Ctrl + G - Save
Ctrl + H - Replace
Ctrl + I - Italic
Ctrl + N - New workbook
Ctrl + O - Open
Ctrl + P - Print
Ctrl + R - Fill right
Ctrl + S - Underline
Ctrl + V - Paste
Ctrl + W - Close
Ctrl + X - Cut
Ctrl + Y - Redo
Ctrl + Z - Undo


Function Keys (F1 - F12):
F1 - Help
F2 - Edit
F3 - Paste name
F4 - Repeat last action
F4 (while inserting a formula) - Toggle between absolute/relative references
F5 - Go to
F6 - Next worksheet
F7 - Spell check
F8 - Extend selection mode
F9 - Recalculate all worksheets
F10 - Activate menu bar
F11 - New chart
F12 - Save As


Date & Time Shortcuts:
Ctrl + : - Insert current time
Ctrl + ; - Insert current date
Copy & Paste:
Ctrl + "-" - Copy value from the cell above
Ctrl + "' " - Copy formula from the cell above


Excel-Specific Shortcuts:
Shift + F1 - What is this?
Shift + F2 - Edit cell comment
Shift + F3 - Insert function into formula
Shift + F4 - Find next
Shift + F5 - Find
Shift + F6 - Previous worksheet
Shift + F8 - Add to selection
Shift + F9 - Calculate active worksheet
Shift + F10 - Context menu
Shift + F11 - New worksheet
Shift + F12 - Save


Window & Navigation Shortcuts:
Ctrl + F3 - Define name
Ctrl + F4 - Close
Ctrl + F5 - Restore window size in Excel
Ctrl + F6 - Next workbook window
Shift + Ctrl + F6 - Previous workbook window
Ctrl + F7 - Move window
Ctrl + F8 - Resize window
Ctrl + F9 - Minimize workbook
Ctrl + F10 - Maximize/Restore window
Ctrl + F11 - Insert macro sheet (Excel 4.0)
Ctrl + F1 - Open file
Alt + F1 - Insert chart
Alt + F2 - Save As
Alt + F4 - Exit
Alt + F8 - Macro dialog box
Alt + F11 - Visual Basic Editor


Additional Shortcuts:
Alt + 64 (@) - Insert @ symbol
Ctrl + Esc - Quickly return to home screen
Ctrl + Shift + F3 - Create name using row and column labels
Ctrl + Shift + F6 - Previous window
Ctrl + Shift + F12 - Print
Alt + Shift + F1 - New worksheet
Alt + Shift + F2 - Save
Alt + = - AutoSum
Ctrl + ` - Toggle between value/formula view
Ctrl + Shift + A - Insert function argument names into a formula
Alt + Down Arrow - Auto-complete list
**Alt + ' ** - Style dialog box


Formatting Shortcuts:
Ctrl + Shift + ~ - General format
Ctrl + Shift + ! - Comma format
Ctrl + Shift + @ - Time format
Ctrl + Shift + # - Date format
Ctrl + Shift + $ - Currency format
Ctrl + Shift + % - Percentage format
Ctrl + Shift + ^ - Exponential format
Ctrl + Shift + & - Add border around selected cells
Ctrl + Shift + _ - Remove border


Selection & Editing:
**Ctrl + Shift + *** - Select the current region
Ctrl + + - Insert
Ctrl + - - Delete
Ctrl + 1 - Format cells dialog box
Ctrl + 2 - Bold
Ctrl + 3 - Italic
Ctrl + 4 - Underline
Ctrl + 5 - Strikethrough
Ctrl + 6 - Show/Hide objects
Ctrl + 7 - Show/Hide standard toolbar
Ctrl + 8 - Toggle outline symbols
Ctrl + 9 - Hide rows
Ctrl + 0 - Hide columns
Ctrl + Shift + ( - Unhide rows
Ctrl + Shift + ) - Unhide columns


Menu & Toolbar Shortcuts:
Alt or F10 - Activate menu
Ctrl + Tab - Next toolbar (in toolbar mode)
Shift + Ctrl + Tab - Previous toolbar (in toolbar mode)
Ctrl + Tab - Activate next workbook (in workbook mode)
Shift + Ctrl + Tab - Activate previous workbook (in workbook mode)
Tab - Next tool
Shift + Tab - Previous tool
Enter - Confirm selection
Shift + Ctrl + F - Font drop-down list
Shift + Ctrl + P - Font size drop-down list

Conclusion

Keyboard shortcuts boost productivity and efficiency. Consistent practice is key to mastering them. So, begin using these shortcuts now! Your future self will be thankful. Why not print these shortcuts off and keep next to your PC.

How to Write a Professional Email

The Basics

Ever sent an email you later regretted? Maybe it was too casual, unclear, or even a bit rude. A poorly written email can cost you a job, damage a relationship, or just make you look unprofessional. In today's business world, email is a key tool. Knowing how to write well is essential. It's more than just typing words; it's about making a good impression.

This guide gives you a step-by-step method. You'll learn to craft effective, professional emails. These emails will help you get the results you want.

1. Mastering the Subject Line

The subject line is your email's first chance to grab attention. Think of it as a mini-advertisement. It needs to be good.

1.1. Clarity and Conciseness

Short and sweet wins the race. Avoid vague words like "Meeting". Instead, be specific. Use "Project Proposal Meeting - Oct 26". This tells the receiver what's up fast.

1.2. Action-Oriented Keywords

Want a response? Use words that push people to act. "Urgent: Approval Needed" is better than "Question". Also, "Request: Project Feedback" works better than "Feedback".

1.3. Avoiding Spam Triggers

Spam filters are like bouncers at a club. Don't use ALL CAPS or too many !!! Exclamation points can get you blocked. Words like "Free", "Guarantee", and "Opportunity" can also trigger spam filters. Keep it clean to reach the inbox.

2. Crafting the Email Body

The email body is where you deliver your message. Clarity, respect, and purpose are key. Get it right for best results.

2.1. Professional Greetings

Start right. Pick a greeting that fits your relationship. "Dear Mr./Ms. [Last Name]" is formal. "Hello [First Name]" is less so. "Hi Team" works for group emails.

2.2. Purpose and Clarity

Get to the point fast. State why you're emailing early on. The BLUF (Bottom Line Up Front) method works wonders. Start with the most important info.

2.3. Tone and Language

Keep it professional. Watch your grammar and spelling. Use tools like Grammarly. These check your writing. Always sound polite and respectful.

3. Structuring Your Message for Impact

How you organise your email matters. Good structure helps the reader understand you better. It also helps them act on your requests.

3.1. Using Paragraphs Effectively

Short paragraphs are your friends. Keep each to a single idea. Space between paragraphs makes it easier to read. Aim for 3-4 sentences per paragraph.

3.2. Bullet Points and Lists

Need to list items? Use bullet points. They make info clear and easy to scan. List action items or needed files. This makes it easy for the recipient to understand.

3.3. Emphasizing Key Information

Bolding or italics can highlight key points. Don't overdo it though. Underlining is best avoided. This is because it looks like a link.

4. Professional Closing and Signature

The end is just as important as the start. Finish strong with a good closing and signature. These make you look professional.

4.1. Appropriate Closings

Pick a closing that matches the situation. "Sincerely" is safe for formal emails. "Best regards" is a bit more casual. "Thank you" works if you're expressing thanks.

4.2. Email Signature Essentials

Your signature is your digital business card. Include your full name, job title, company, and contact info. Create a template to save time.

4.3. Proofreading Before Sending

Always check your email before sending. Read it aloud to catch errors. A fresh look can catch mistakes.

5. Advanced Email Etiquette

Want to go from good to great? Master these advanced tips. They'll set you apart.

5.1. Responding Promptly

Aim to reply within 24-48 hours. This shows you're on the ball. Set up auto-replies when you're away. This lets people know you're not ignoring them.

5.2. The Art of "Reply All"

Use "Reply All" sparingly. Only use it when everyone on the thread needs to see your response. This avoids annoying people with irrelevant emails.

5.3. Managing Attachments

Compress large files before sending. Name attachments clearly, so they know what it is. Use PDF for documents. This keeps the formatting consistent.

Conclusion

Writing professional emails is a key skill. This guide has covered the main points. From subject lines to signatures, each piece matters. Good communication helps you succeed. Start using these tips today and improve your email game!

Social Media Policy: What to Include in Your Staff Handbook

Social media is powerful. It can connect people and build brands. But it also poses risks. A single post can damage your company's image. That's why you need a social media policy. Your staff handbook is the perfect place for it. This policy protects your business. It also guides your employees. Let's explore what to include.

Why Your Staff Handbook Needs a Social Media Policy

A social media policy is vital. It protects your company's reputation. It also reduces legal risks. Imagine an employee posting something offensive. This could lead to a PR nightmare. A clear policy prevents such situations. It also maintains brand consistency. Everyone knows the rules.

The Risks of Ignoring Social Media Guidelines

What happens without a policy? A lot can go wrong. PR crises can erupt quickly. Legal troubles might follow. You could lose customer trust. Employees may share confidential information. All of these issues hurt your bottom line.

Statistics on Social Media Misuse in the Workplace

Consider these numbers. A large percentage of companies have disciplined employees. It was all because of social media posts. Some firms suffered serious financial losses because of social media crises. This shows the real impact of misuse.

Defining Acceptable Use and Conduct

Your policy should define acceptable use. What is allowed and what isn't? Make this very clear. This section is key to preventing misunderstandings.

Representing the Company vs. Personal Use

Distinguish between company and personal accounts. When are employees representing the company? Provide clear guidelines. Include disclaimers for personal opinions. For instance, "The views expressed are my own." This makes it clear they aren't speaking for the business.

Prohibited Content and Activities

List prohibited content and activities. What isn't allowed on social media? Sharing confidential information is a definite no. Harassment, discrimination, and bullying are unacceptable. False or misleading statements should also be banned.

Respecting Copyright and Intellectual Property

Copyright matters. Employees must respect it. Teach them to cite sources properly. Avoid unauthorised use of images and videos. Using someone else's content can lead to legal issues.

Guidelines for Brand Representation

How should employees represent your brand? Provide clear guidelines. Focus on positive and consistent messaging. This ensures a unified image.

Maintaining a Professional Tone

What does a professional tone sound like? Give examples. Avoid slang, profanity, and offensive remarks. Use respectful and courteous language. This keeps your brand looking good.

Sharing Accurate and Verified Information

Accuracy is key. Employees should fact-check everything. Avoid spreading misinformation. Direct inquiries to the right channels. Don't speculate or share unconfirmed reports.

Engaging with Customers and Stakeholders

Explain how to engage with customers. Employees should respond promptly and professionally. Address complaints appropriately. Positive interactions build relationships.

Monitoring, Enforcement, and Consequences

How will you monitor social media activity? What happens if someone breaks the rules? Explain your enforcement procedures.

Social Media Monitoring Practices

Explain how you monitor employee social media. What tools do you use? Be transparent. Tell employees they will be monitored.

Enforcement Procedures

Outline the steps for dealing with violations. Include an investigation process. Document everything. Report any issues properly.

Consequences of Violations

What are the consequences? State them clearly. Verbal warnings might be a first step. Written reprimands could follow. Suspension or termination are possible.

Legal Considerations and Disclaimers

Consider legal aspects. Include necessary disclaimers. This protects your company.

Compliance with Laws and Regulations

Your policy must comply with laws. Consider privacy laws like GDPR and CCPA. Be aware of defamation laws. Also, consider labor laws.

Employee Privacy Rights

Protect employee privacy. Have guidelines on using employee data. Be transparent about data collection.

Disclaimer Statements

Include disclaimer statements. These protect you from liability. Clarify that employee opinions are their own. Disclaimers can address the accuracy of shared information.

Updating and Communicating the Policy

How will you update your policy? How will you communicate changes to employees? Make sure it’s accessible.

Regular Policy Review and Updates

Commit to reviewing your policy regularly. How often will you review it? Incorporate feedback from employees.

Training and Education

Provide training on your policy. Include it in onboarding for new hires. Offer ongoing training for existing employees.

Accessibility and Communication Channels

Ensure the policy is easy to find. Use multiple communication channels. Email, company intranet, and meetings all work.

Conclusion

A well-crafted social media policy is essential. It protects your company and empowers your employees. By including clear guidelines, you can mitigate risks and maintain a consistent brand image. Regular updates, training, and open communication are crucial for its effectiveness. Make it part of your staff handbook today.